• Welcome
  • About
  • Showroom
  • Gallery
  • Blog
  • Contact
Menu

Stairhaus  Inc. | Custom Stair Design and Construction

300 Vespra Street
Barrie, ON, L4N 2C9
(705)733-9292
Innovative Design. Definitive Style.

Your Custom Text Here

Stairhaus  Inc. | Custom Stair Design and Construction

  • Welcome
  • About
  • Showroom
  • Gallery
  • Blog
  • Contact

Barn Board Feature Wall - Do it Yourself!

November 24, 2015 Matt Kiegelmann

Check out these progress pics from a barn board feature wall we installed this past weekend. Follow a few simple steps and this easy to install project can be installed by anyone with a little patience and a few tools.

Tools Required: 16g air nailer, compressor, hand stapler, chop saw, table saw or skill saw, jig saw, hammer.

Materials Required: dressed barn board, tar paper (roofing), 16g brad nails, staples

Installation:

- cut and staple tar paper to the wall. The black background makes and holes/cracks in the barn board disappear on the wall.
- install barn board working your way from the top to the bottom.
- the jig saw will be required to cut out light switches and electrical outlets.
- the bottom board will have to be ripped to fit against the floor. You can use a table saw or skill saw with a guide.

BOOM! YOU ARE DONE!

The key to a seamless and quick install is having the material dressed and ready to be installed. Let us take care of the supply and shop work, you install and blow your wife's mind!

 Step #1  Cut and staple tar paper to the wall. The black background makes and holes/cracks in the barn board disappear on the wall.  Step #1  Cut and staple tar paper to the wall. The black background makes and holes/cracks in the barn board disappear on the wall.  Step #2  Install barn board working your way from the top to the bottom.  Step #3  The bottom board will have to be ripped to fit against the floor. You can use a table saw or skill saw with a guide.  BOOM! your wife's mind is now blown with your handy work and your house looks way cooler!


Tags barn board, barnboard, feature wall, rustic, reclaimed, barn, reuse, recycle
Comment

Gallery Updated!

November 13, 2015 Matt Kiegelmann

Dendor Fine Homes - Model Home,  NOW OPEN

www.dendorfinehomes.com

Another monthly gallery update!  Head on over to our gallery to see some of the projects we recently completed or are still working on!

Thanks for your support and have a great weekend.

<3 Stairhaus

Tags stairs, railings, railings barrie, stairs barrie, reclaimed barrie, barn board barrie, barnboard, barn board toronto, feature wall, barn beam, barn beam barrie, dendor fine homes, model home, springwater, midhurst, carson ridge
1 Comment

Clear Coat Epoxy Resin Finishes

June 19, 2015 Matt Kiegelmann

Epoxy Resin Finish

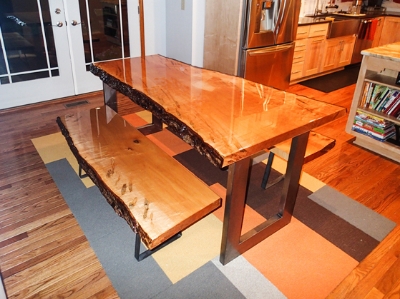
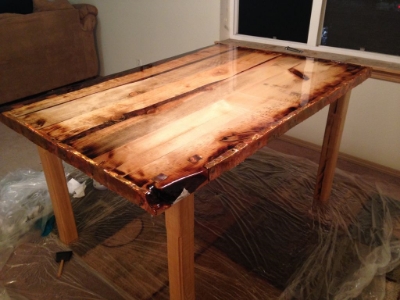
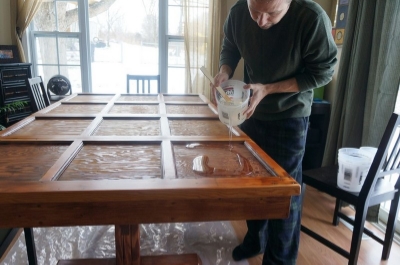
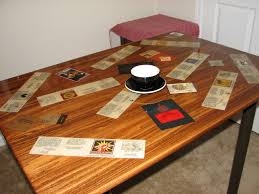
In my opinion, the BEST way to finish a table top, live edge slab or any wood product where you want to see a crystal clear finish and have the highest level of protection.  Epoxy self-levels to 1/8", creating a virtually indestructible surface. The result is a crystal clear, brilliant surface that accentuates the material below it.  The epoxy resin is specially formulated to resist scratching and provide long lasting maintenance free protection for your surface.

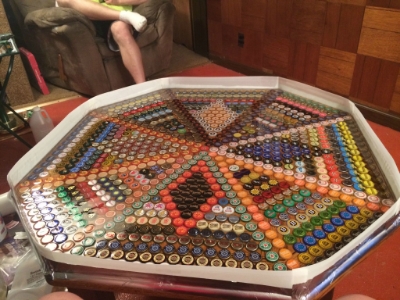
Another cool use for an epoxy finish is that it can capture/protect materials added to a surface.  For example, you could create a penny or beer cap table and fill all the voids with the resin.  It will self level and lock everything down so it will never move again. 

Beer Cap Table with Epoxy Finish


Here are a few more examples of epoxy resin finishes.  If you want a finish like this, we have access to the materials and can have it professionally finished for you!

df36N4P.jpg epoyx-wood-table.jpg FJ3GWNXI0HZ2V8K.LARGE.jpg GarageDoorTable32.jpg images23.jpg maxresdefault.jpg


Tags epoxy, epoxy resin, epoxy barrie, stairs, railings, stairs barrie, railings barrie., custom woodworking, harvest table, relcaimed, barnboard, toronto, epoxy toronto
Comment

EXPERIENCE. KNOWLEDGE. CRAFTSMANSHIP.

2022 stairhaus inc.